Focus - First and foremost it is important that you ensure that the picture you're using is in focus. Have a look at the image, zoom in on your computer and see if the edges are sharp. Make sure that you can make out your image.
Resolution - This is how detailed your image is and it is measured in DPI. You want your image to be no less than 200 DPI (which means for each square inch of the image, there are 200 dots). The higher the DPI the better quality your image will be.
Dimensions - This is exactly what it sounds like, it's the size of your image. It can be measured in pixels, centimetres, millimetres, inches and so on. The bigger your image (if it is still at 200 DPI) the better as you will be able to scale it down and maintain a good quality, however if you have a small image and zoom in, you will experience a loss in quality as you do so. You can make your design bigger or smaller in the design interface, however we would advise using an image that is approximately the right size where possible.
Lighting - Make sure that your picture is well lit, but not too bright. There is a middle ground that hits the sweet spot here. You want to be able to see the subject clearly, but you don't want glare.
Detailed Zoom Function
Introducing the new detailed zoom function!
Once you have uploaded your image to our easy-to-use design interface, and click the 'Preview and Buy' button you are presented with a pop up which shows you your fully customised product from a multitude of angles.
Under each thumbnail image you will see an 'Edit' button and a 'Zoom' button. If you select the zoom option it will load your newly designed product in a larger screen.
To take full advantage of the new zoom function, all you need to do is hover your cursor over the part of the design that you would like to see in more detail. This will give you a magnifying glass effect for that part of your design. You can move this magnifying glass around and check all the edges and fine details of your design.
Edit an Image
Crop and Rotate - On the design interface, click on the "Images & Text Tools" tab. Select "Add Image". All your uploaded images will show in your image gallery. Each image shows a little pen on its top left side. Click on it. You can then either start cropping or rotate
Create a Transparent Background - This one is a little trickier and it depends on the image that you are using. You can either use image editing software to carefully trace round your image ensuring to match up the lines (this is the method that produces the best results, but is tricky and time consuming) or you can use an automatic tool. You can find these by doing a simple search online, and some image editing software will also have the functionality. This works by removing all pixels of a specific colour. It is not always the most accurate, as you may have a green background and green shoelaces. If so, all green will be removed indiscriminately.
Saving Images With a Transparent Background - Once you have made the background of your image transparent, it is important that you save this file as a PNG. If you save this as a JPEG or BMP then all of your hard work will be undone, as it will stick the image onto a white background to save it.
Centre Your Image - Within the design interface you will see a directional pad, with a centre cross-hair. If you click this centre cross-hair at any point it will automatically centre your image, making whatever is in the dead centre of the picture will be centralised to the product.
Rotation - You also have rotation buttons within the design interface which will allow you to rotate your whole image by 15° at a time. (Click six times to rotate by 90°)
Auto Size - As well as having what appears to be a zoom in and out button (these are enlarge and reduce the image size) you also get two auto-size buttons. The button with the arrows pointing inwards will automatically make your image the right size to sit just within the bleed area, whereas the one with the arrows pointing out match your image with the outer edges of the product, also filling the bleed areas.
How to use the Fabric Design Interface
Design Errors & Failed Designs
In order to maintain a high standard of quality, our design interface notifies you if your design is not quite right. Here's what you need to know.
Waiting for Approval Our system is processing your design, then it will be published.
Out of Stock The product is out of stock. Check back regularly or sign up for an email notification on the product page.
Design Errors
Low quality images: you've uploaded an image that won't print with the best quality. To amend this, either shrink your image or upload a new image that is higher quality. Try creating a repeat pattern as well.
Very small images: you've uploaded an image that is too small to see clearly. To amend this, enlarge your image until it's acceptable quality or replace with a higher quality image.
White space detected: you haven't covered the entire surface of your product, so part of it is left white. To amend this, please enlarge the image or apply a repeat pattern to cover the full surface including the bleed area. If this was intentional, apply a white background colour using the hex code: #ffffff
Text too close to edge: you've added text too close to the edge of the panel and it's overlapping with the bleed area (in red). To amend this, please move your text out of the bleed area and away from any edges to ensure it prints correctly.
Incomplete design: you've either left a panel of your product only partially designed, or didn't design a panel of your product. To amend this, please review all the panels of your product and ensure they're all covered. If you'd like to leave part of your design white, apply a background colour using the hex code: #ffffff
Offensive words: you've included one or more offensive words in your design. To amend this, please remove the offensive word.
Brand words: you've entered the name of an established brand on your design. To amend this, please remove the brand's name.
Failed Design Our system was unable to process your design. Please try again and resubmit it.
Colours variations across fabrics
Colour
variations from the same graphic across multiple fabrics is to be expected to
some degree.
The fabric base colour, opacity,
thickness, weight, weave and light reflectivity can all have an effect on the
print colour and the appearance of the print colour.
Different lighting conditions will
also make printed fabrics colour appear to vary.
Whilst we endeavour to ensure all of
our printers are calibrated for each fabric, the above must be taken into
consideration when ordering the same graphic or colours across multiple types
of fabrics and inksets. Choosing similar weights and weaves can help to ensure
your colours look as great as you would like them to.
Please note as well that every once in a while, our printing team tweaks printer calibrations to refine colours. They are constantly on the lookout for new and improved ways to print, strengthening print processes and improving colour precision wherever possible. We might also upgrade our machinery to optimise printing outputs. These can result in some colour variations between two identical orders on the same fabric. These will be minimal however still slightly visible. In case some colour variations may impact your work and you wish to re-order after a certain time, we do advise to order new fabric samples shortly before your larger print run. This will ensure you receive prints with a the closest colour accuracy possible.
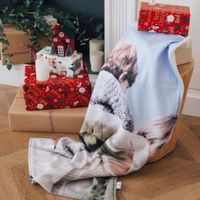
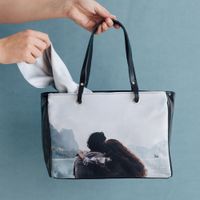
Create a Collage in a few easy steps
The following short video explains in a few easy steps how to create a montage on our website:
It's easy and fun!
How many images can I add?
This will mostly depend on your images: the more pictures you add the smaller they will be. Also bear in mind that a close-up picture will show more details than group pictures or pictures with people in the distance. When adding images into your product or using the montage option, be on the lookout for the green/blue flags. When you see them you should take pictures off, also beware the duplication warning.
Trouble with Image Upload
Please try clearing your browser's cookies first. We also advise to use Google Chrome. See instructions below:
Internet Explorer Press CTRL + SHIFT + DELETE to open the "Delete Browsing History" popup or select the Tools menu from the Internet Explorer window, and click Delete Browsing History. In the Delete Browsing History window, check the box next to Cookies. You can uncheck everything else if you want to remove only cookies. Click Delete button to remove all cookies stored in Internet Explorer.
Firefox Press CTRL + SHIFT + DELETE to open "Clear All History" popup. At the bottom of the Cookies window that appears, click the Remove All Cookies button to delete all cookies associated with your Firefox browser.
Chrome Click CTRL + SHIFT + DELETE to open the "Clear browsing data" popup.When the list of cookies appears, click the Remove All button to delete all cookies stored in Chrome.
Safari for Windows Click the Gears menu in the upper-right corner of the Safari window. From there, select Reset Safari. Check the bottom box, labeled Remove all website data. You can uncheck everything else if you want to remove only cookies. Click the Reset button to eliminate all cookies associated with Safari.
Safari for MAC Click the SAFARI -> Reset Safari in the upper left menu. Check "Empty the Cache" and "Remove all cookies" than press "RESET"
Is there an image library?
Check out our Image Library for backgrounds, flags, hearts, ornaments, washing instructions and more:
Click on the green "Design" button or "Please Click to Add Image(s) or Text" on the right hand-side of the design interface
Select the "Image Library" tab and browse through the categories or use the small search bar
Upload more than one image at a time
Click on the green "Design" button, or from the "Images & Text Tools" tab or even "Please Click to Add Image(s) or Text" on the right hand-side of the design interface.
Click on "Select Image to Upload"
Press the CTRL button on your keyboard.
Click on each image you wish to upload
Release the CTRL Key
Press the "Open" button. Your images will upload onto the gallery, ready to be added to your product.
Tip: If you select them all then and click on the blue button "Create montage with xx images" you can either:
create various montages (photo frame, scatter, plain, plain heart, frame heart). Don't forget to press the green "Add to design" button to add your montage to the design interface.
or even add all the images at once onto the design interface for you to organise as you wish with "do it yourself"
Duplicate a design onto another side
In case you have several sides, pages in your product, you can duplicate a design from one side to another.
Click on the 2Images & Text Tools" tab
Click on "Add Image"
Then "Duplicate Existing design"
You can then select the design you wish to duplicate
Follow the same steps if there are other sides you with to duplicate onto. We cannot duplicate a design from one product (say cushion) to another (say canvas)